Posts

Showing posts from September, 2011

JAVA-04 The Structure of Java Code
Image
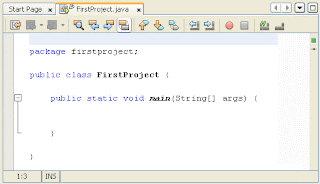
In the previous section , you tidied up your code a bit. Here's what your coding window should look like now: You can see we have the package name first. Notice how the line ends with a semicolon. If you miss the semicolon out, the programme won't compile:            package firstproject; //The class name comes next:            public class FirstProject {            } You can think of a class as a code segment. But you have to tell Java where code segments start and end. You do this with curly brackets. The start of a code segment is done with a left curly bracket { and is ended with a right curly bracket }. Anything inside of the left and right curly brackets belong to that code segment. What's inside of the left and right curly brackets for the class is another code segment. This one:           public static void main ( String[ ] args ) {           } The word

JAVA-03 Java Comments

Image
When you create a New Project in NetBeans, you'll notice that some text is greyed out, with lots of slashes and asterisks: The greyed-out areas are comments. When the programme runs, comments are ignored. So you can type whatever you want inside of your comments. But it's usual to have comments that explain what is you're trying to do. You can have a single line comment by typing two slashes, followed by your comment: // This is a single line comment If you want to have more than one line, you can either do this: // This is a comment spreading // over two lines or more Or you can do this: /* This is a comment spreading over two lines or more */ In the comment above, note how it starts with /*. To end the comment, we have */ instead. There's also something called a Javadoc comment. You can see two of these in the coding image on the previous page. A Javadoc comment starts

JAVA-02 The NetBeans Software

Image
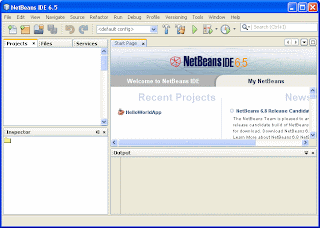
When you first run NetBeans, you'll see a screen something like this one: You may have to drum your fingers and wait a while, as it's not the fastest thing in the world. To start a new project, click on File > New Project from the NetBeans menu at the top. You'll see the following dialogue box appear: We're going to be create a Java Application, so select Java under Categories, and then Java Application under Projects. Click the Next button at the bottom to go to step two: In the Project Name area at the top, type a Name for your Project. Notice how the text at the bottom changes to match your project name (in the text box to the right of Create Main Class): firstproject.Main If we leave it like that, the Class will have the name Main. Change it to FirstProject : Now, the Class created will be called FirstProject, with a capital "F", capital "P".